Race added to RSC Photo Gallery: 27/07/2009
Last photo update on this page: 27/07/2009
| | | | | | |
| 4 | 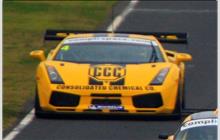 |
| Closed bodywork |
| Driven by: Ted Huglin (AUS) | Result: Race 1: 15th (-13 laps behind the winner) ; Race 2: 14th (-13 laps behind the winner) ; Race 3: 15th (-13 laps behind the winner)
Grid: 16th (1:39.5401) |
| Colours: unknown |
| Tyres: unknown |
| Photo updated: 27/07/2009 | Photo by courtesy of: Rachael Wagg Australian GT |
| | | | | | |
| 7 | 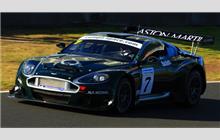 |
| Closed bodywork |
| Driven by: Peter Hackett (AUS) | Result: Race 1: 2nd (-13 laps behind the winner) ; Race 2: 4th (-13 laps behind the winner) ; Race 3: 4th (-13 laps behind the winner)
Grid: 3rd (1:34.0109) |
| Colours: unknown |
| Tyres: unknown |
| Photo updated: 27/07/2009 | Photo by courtesy of: Rachael Wagg Australian GT |
| | | | | | |
| 10 | 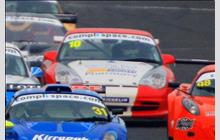 |
| Closed bodywork |
| Driven by: Mark Krashos (AUS) | Result: Race 1: 13th (-13 laps behind the winner) ; Race 2: 11th (-13 laps behind the winner) ; Race 3: 11th (-13 laps behind the winner)
Grid: 15th (1:39.4309) |
| Colours: unknown |
| Tyres: unknown |
| Photo updated: 27/07/2009 | Photo by courtesy of: Rachael Wagg Australian GT |
| | | | | | |
| 12 |  |
| Closed bodywork |
| Driven by: Mark Eddy (AUS) | Result: Race 1: 4th (-13 laps behind the winner) ; Race 2: 3rd (-13 laps behind the winner) ; Race 3: 5th (-13 laps behind the winner)
Grid: 4th (1:34.1823) |
| Colours: unknown |
| Tyres: unknown |
| Photo updated: 27/07/2009 | Photo by courtesy of: Rachael Wagg Australian GT |
| | | | | | |
| 14 | 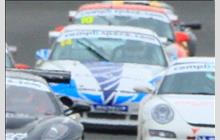 |
| Closed bodywork |
| Driven by: Greg Ward (AUS) | Result: Race 1: 10th (-13 laps behind the winner) ; Race 2: 8th (-13 laps behind the winner) ; Race 3: 9th (-13 laps behind the winner)
Grid: 14th (1:38.7080) |
| Colours: unknown |
| Tyres: unknown |
| Photo updated: 27/07/2009 | Photo by courtesy of: Rachael Wagg Australian GT |
| | | | | | |
| 31 |  |
| - |
| Driven by: Scott Bargwanna (AUS) | Result: Race 1: 6th (-13 laps behind the winner) ; Race 2: 5th (-13 laps behind the winner) ; Race 3: 6th (-13 laps behind the winner)
Grid: 5th (1:34.4306) |
| Colours: unknown |
| Tyres: unknown |
| Photo updated: 27/07/2009 | Photo by courtesy of: Rachael Wagg Australian GT |
| | | | | | |
| 57 | 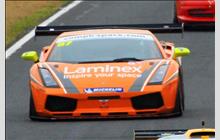 |
| Closed bodywork |
| Driven by: Ross Lilley (AUS) | Result: Race 1: 5th (-13 laps behind the winner) ; Race 2: 6th (-13 laps behind the winner) ; Race 3: 3rd (-13 laps behind the winner)
Grid: 6th (1:34.5293) |
| Colours: unknown |
| Tyres: unknown |
| Photo updated: 27/07/2009 | Photo by courtesy of: Rachael Wagg Australian GT |
| | | | | | |
| 58 |  |
| Closed bodywork |
| Driven by: Richard Kimber (AUS) | Result: Race 1: 11th (-13 laps behind the winner) ; Race 2: 12th (-13 laps behind the winner) ; Race 3: 10th (-13 laps behind the winner)
Grid: 8th (1:37.6308) |
| Colours: unknown |
| Tyres: unknown |
| Photo updated: 27/07/2009 | Photo by courtesy of: Rachael Wagg Australian GT |
| | | | | | |
| 59 |  |
| Closed bodywork |
| Driven by: John Kaias (AUS) | Result: Race 1: 3rd (-13 laps behind the winner) ; Race 2: winner - (148.000 kph) ; Race 3: winner - (148.000 kph)
Grid: 1st (1:32.6500) |
| Colours: unknown |
| Tyres: unknown |
| Photo updated: 27/07/2009 | Photo by courtesy of: Rachael Wagg Australian GT |
| | | | | | |
| 68 |  |
| Closed bodywork |
| Driven by: Kim Burke (AUS) | Result: Race 1: 12th (-13 laps behind the winner) ; Race 2: did not finish ; Race 3: did not start
Grid: 11th (1:38.3809) |
| Colours: unknown |
| Tyres: unknown |
| Photo updated: 27/07/2009 | Photo by courtesy of: Rachael Wagg Australian GT |
| | | | | | |
| 77 | 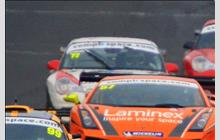 |
| Closed bodywork |
| Driven by: Anthony Kosseris (AUS) | Result: Race 1: 16th (-13 laps behind the winner) ; Race 2: 10th (-13 laps behind the winner) ; Race 3: 12th (-13 laps behind the winner)
Grid: 13th (1:38.5657) |
| Colours: unknown |
| Tyres: unknown |
| Photo updated: 27/07/2009 | Photo by courtesy of: Rachael Wagg Australian GT |
| | | | | | |
| 80 | 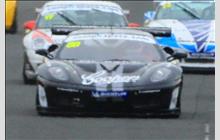 |
| Closed bodywork |
| Driven by: Nick O'Halloran (AUS) | Result: Race 1: 14th (-13 laps behind the winner) ; Race 2: 13th (-13 laps behind the winner) ; Race 3: 13th (-13 laps behind the winner)
Grid: 9th (1:38.1257) |
| Colours: unknown |
| Tyres: unknown |
| Photo updated: 27/07/2009 | Photo by courtesy of: Rachael Wagg Australian GT |
| | | | | | |
| 88 | 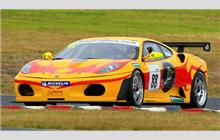 |
| Closed bodywork |
| Driven by: John Teulan (AUS) | Result: Race 1: 7th (-13 laps behind the winner) ; Race 2: 7th (-13 laps behind the winner) ; Race 3: 8th (-13 laps behind the winner)
Grid: 7th (1:36.7053) |
| Colours: unknown |
| Tyres: unknown |
| Photo updated: 27/07/2009 | Photo by courtesy of: Rachael Wagg Australian GT |
| | | | | | |
| 91 | 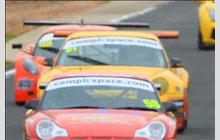 |
| Closed bodywork |
| Driven by: Graeme Cook (AUS) | Result: Race 1: 9th (-13 laps behind the winner) ; Race 2: 15th (-12 laps behind the winner) ; Race 3: 7th (-13 laps behind the winner)
Grid: 10th (1:38.2178) |
| Colours: unknown |
| Tyres: unknown |
| Photo updated: 27/07/2009 | Photo by courtesy of: Rachael Wagg Australian GT |
| | | | | | |
| 97 | 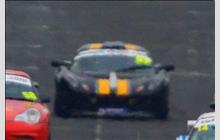 |
| - |
| Driven by: Timothy Poulton (AUS) | Result: Race 1: 17th (-12 laps behind the winner) ; Race 2: did not finish ; Race 3: 16th (-12 laps behind the winner)
Grid: 17th (1:41.7332) |
| Colours: unknown |
| Tyres: unknown |
| Photo updated: 27/07/2009 | Photo by courtesy of: Rachael Wagg Australian GT |
| | | | | | |
| 98 | 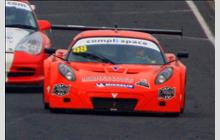 |
| Closed bodywork |
| Driven by: Angelo Lazaris (AUS) | Result: Race 1: 8th (-13 laps behind the winner) ; Race 2: 9th (-13 laps behind the winner) ; Race 3: 14th (-13 laps behind the winner)
Grid: 12th (1:38.4204) |
| Colours: unknown |
| Tyres: unknown |
| Photo updated: 27/07/2009 | Photo by courtesy of: Rachael Wagg Australian GT |
| | | | | | |
| 99 |  |
| - |
| Driven by: Peter Lucas (AUS) | Result: Race 1: winner - (150.000 kph) ; Race 2: 2nd (-13 laps behind the winner) ; Race 3: 2nd (-13 laps behind the winner)
Grid: 2nd (1:33.2603) |
| Colours: unknown |
| Tyres: unknown |
| Photo updated: 27/07/2009 | Photo by courtesy of: Rachael Wagg Australian GT |
| | | | | | |
| 43 |  |
| Closed bodywork |
| Driven by: Dave Stevens (AUS) | Result: Race 1: did not start ; Race 2: did not start ; Race 3: did not start
Grid: |
| Colours: unknown |
| Tyres: unknown |
If you have a picture of any car that is missing in the gallery or you might have a better photo, please, do not hesitate to
get in touch with us.
More photos from this race:
×
RSC website is made possible by displaying online advertisements to our visitors.
Please, turn off or otherwise disable your Ad Blocking software
or
become an RSC Donator and contact us.