Race added to RSC Photo Gallery: 27/07/2009
Last photo update on this page: 27/07/2009
| | | | | | |
| 4 |  |
| Closed bodywork |
| Driven by: John Bowe (AUS) | Result: Race 1: winner - (146.000 kph) - margin: 13s291 ; Race 2: winner - (114.000 kph) - margin: 4s535 ; Race 3: winner - (146.000 kph) - margin: 20s153
Grid: 1st (1:32.9957) |
| Colours: unknown |
| Tyres: unknown |
| Photo updated: 27/07/2009 | Photo by courtesy of: Rachael Wagg Australian GT |
| | | | | | |
| 5 | 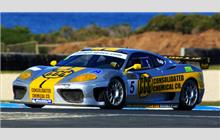 |
| Closed bodywork |
| Driven by: Ted Huglin (AUS) | Result: Race 1: did not finish ; Race 2: did not finish ; Race 3: 7th (1 lap behind the winner)
Grid: 10th (1:40.2541) |
| Colours: unknown |
| Tyres: unknown |
| Photo updated: 27/07/2009 | Photo by courtesy of: Rachael Wagg Australian GT |
| | | | | | |
| 7 |  |
| Closed bodywork |
| Driven by: Peter Hackett (AUS) | Result: Race 1: did not start ; Race 2: did not start ; Race 3: did not start
Grid: 3rd (1:34.2479) |
| Colours: unknown |
| Tyres: unknown |
| Photo updated: 27/07/2009 | Photo by courtesy of: Rachael Wagg Australian GT |
| | | | | | |
| 9 |  |
| Closed bodywork |
| Driven by: Michael Loccisano (AUS) | Result: Race 1: 7th (1m36s301 behind the winner) ; Race 2: 5th (48s435 behind the winner) ; Race 3: 9th (1 lap behind the winner)
Grid: 8th (1:39.6574) |
| Colours: unknown |
| Tyres: unknown |
| Photo updated: 27/07/2009 | Photo by courtesy of: Rachael Wagg Australian GT |
| | | | | | |
| 10 |  |
| - |
| Driven by: Mark O'Connor (AUS) | Result: Race 1: did not finish ; Race 2: did not finish ; Race 3: 12th (1 lap behind the winner)
Grid: 19th (1:45.6005) |
| Colours: unknown |
| Tyres: unknown |
| Photo updated: 27/07/2009 | Photo by courtesy of: Rachael Wagg Australian GT |
| | | | | | |
| 12 |  |
| Closed bodywork |
| Driven by: Mark Eddy (AUS) | Result: Race 1: 2nd (13s291 behind the winner) ; Race 2: 2nd (4s535 behind the winner) ; Race 3: 2nd (20s153 behind the winner)
Grid: 2nd (1:33.5759) |
| Colours: unknown |
| Tyres: unknown |
| Photo updated: 27/07/2009 | Photo by courtesy of: Rachael Wagg Australian GT |
| | | | | | |
| 23 |  |
| Closed bodywork |
| Driven by: Beric Lynton (AUS) | Result: Race 1: 10th (1m50s228 behind the winner) ; Race 2: 6th (51s714 behind the winner) ; Race 3: 6th (1m50s918 behind the winner)
Grid: 18th (1:45.2416) |
| Colours: unknown |
| Tyres: unknown |
| Photo updated: 27/07/2009 | Photo by courtesy of: Rachael Wagg Australian GT |
| | | | | | |
| 33 | 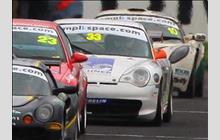 |
| Closed bodywork |
| Driven by: Fraser Kirchner (AUS) | Result: Race 1: 12th (1 lap behind the winner) ; Race 2: 11th (1m52s052 behind the winner) ; Race 3: 13th (1 lap behind the winner)
Grid: 14th (1:43.2071) |
| Colours: unknown |
| Tyres: unknown |
| Photo updated: 27/07/2009 | Photo by courtesy of: Rachael Wagg Australian GT |
| | | | | | |
| 55 |  |
| - |
| Driven by: Garth Walden (AUS) | Result: Race 1: 8th (1m39s657 behind the winner) ; Race 2: 4th (46s814 behind the winner) ; Race 3: 5th (1m44s067 behind the winner)
Grid: 12th (1:42.2904) |
| Colours: unknown |
| Tyres: unknown |
| Photo updated: 27/07/2009 | Photo by courtesy of: Rachael Wagg Australian GT |
| | | | | | |
| 57 |  |
| Closed bodywork |
| Driven by: Ross Lilley (AUS) | Result: Race 1: did not start ; Race 2: did not start ; Race 3: did not start
Grid: 5th (1:36.0030) |
| Colours: unknown |
| Tyres: unknown |
| Photo updated: 27/07/2009 | Photo by courtesy of: Rachael Wagg Australian GT |
| | | | | | |
| 58 | 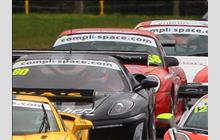 |
| Closed bodywork |
| Driven by: Richard Kimber (AUS) | Result: Race 1: 5th (1m24s510 behind the winner) ; Race 2: 8th (1m12s446 behind the winner) ; Race 3: 8th (1 lap behind the winner)
Grid: 9th (1:39.6850) |
| Colours: unknown |
| Tyres: unknown |
| Photo updated: 27/07/2009 | Photo by courtesy of: Rachael Wagg Australian GT |
| | | | | | |
| 59 | 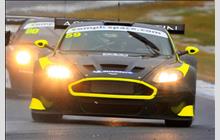 |
| Closed bodywork |
| Driven by: John Kaias (AUS) | Result: Race 1: 3rd (14s838 behind the winner) ; Race 2: 3rd (7s840 behind the winner) ; Race 3: 3rd (21s383 behind the winner)
Grid: 4th (1:34.6523) |
| Colours: unknown |
| Tyres: unknown |
| Photo updated: 27/07/2009 | Photo by courtesy of: Rachael Wagg Australian GT |
| | | | | | |
| 66 |  |
| Closed bodywork |
| Driven by: Garth Rainsbury (AUS) | Result: Race 1: 13th (1 lap behind the winner) ; Race 2: 10th (1m51s543 behind the winner) ; Race 3: 14th (1 lap behind the winner)
Grid: 17th (1:45.0497) |
| Colours: unknown |
| Tyres: unknown |
| Photo updated: 27/07/2009 | Photo by courtesy of: Rachael Wagg Australian GT |
| | | | | | |
| 68 |  |
| Closed bodywork |
| Driven by: Kim Burke (AUS) | Result: Race 1: 6th (1m29s773 behind the winner) ; Race 2: did not finish ; Race 3: did not start
Grid: 15th (1:43.3066) |
| Colours: unknown |
| Tyres: unknown |
| Photo updated: 27/07/2009 | Photo by courtesy of: Rachael Wagg Australian GT |
| | | | | | |
| 80 | 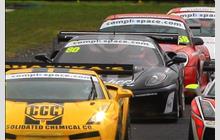 |
| Closed bodywork |
| Driven by: Nick O'Halloran (AUS) | Result: Race 1: 4th (1m11s062 behind the winner) ; Race 2: 7th (54s154 behind the winner) ; Race 3: 4th (1m39s017 behind the winner)
Grid: 6th (1:37.3131) |
| Colours: unknown |
| Tyres: unknown |
| Photo updated: 27/07/2009 | Photo by courtesy of: Rachael Wagg Australian GT |
| | | | | | |
| 97 | 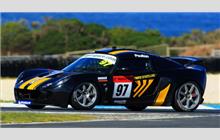 |
| - |
| Driven by: Timothy Poulton (AUS) | Result: Race 1: 11th (1 lap behind the winner) ; Race 2: 9th (1m22s171 behind the winner) ; Race 3: 10th (1 lap behind the winner)
Grid: 16th (1:44.8486) |
| Colours: unknown |
| Tyres: unknown |
| Photo updated: 27/07/2009 | Photo by courtesy of: Rachael Wagg Australian GT |
| | | | | | |
| 14 |  |
| Closed bodywork |
| Driven by: Greg Ward (AUS) | Result: Race 1: did not start ; Race 2: did not start ; Race 3: did not start
Grid: 7th (1:39.3489) |
| Colours: unknown |
| Tyres: unknown |
| | | | | | |
| 31 | |
| - |
| Driven by: David Mackie (AUS) | Result: Race 1: 14th (1 lap behind the winner) ; Race 2: did not finish ; Race 3: 11th (1 lap behind the winner)
Grid: 13th (1:42.8514) |
| Colours: unknown |
| Tyres: unknown |
| | | | | | |
| 51 | |
| - |
| Driven by: Andrew MacPherson (AUS) | Result: Race 1: did not start ; Race 2: did not start ; Race 3: did not start
Grid: 20th (1:52.8460) |
| Colours: unknown |
| Tyres: unknown |
| | | | | | |
| 74 | |
| Closed bodywork |
| Driven by: Keith Wong (HK) | Result: Race 1: 9th (1m48s970 behind the winner) ; Race 2: did not finish ; Race 3: did not start
Grid: 11th (1:42.0790) |
| Colours: unknown |
| Tyres: unknown |
| | | | | | |
| 86 | |
| - |
| Driven by: Angela Coradine (AUS) | Result: Race 1: did not start ; Race 2: did not start ; Race 3: did not start
Grid: |
| Colours: unknown |
| Tyres: unknown |
| | | | | | |
| 88 | |
| Closed bodywork |
| Driven by: John Teulan (AUS) | Result: Race 1: did not start ; Race 2: did not start ; Race 3: did not start
Grid: |
| Colours: unknown |
| Tyres: unknown |
| | | | | | |
| 99 | |
| - |
| Driven by: Peter Lucas (AUS) | Result: Race 1: did not start ; Race 2: did not start ; Race 3: did not start
Grid: |
| Colours: unknown |
| Tyres: unknown |
If you have a picture of any car that is missing in the gallery or you might have a better photo, please, do not hesitate to
get in touch with us.
More photos from this race:
×
RSC website is made possible by displaying online advertisements to our visitors.
Please, turn off or otherwise disable your Ad Blocking software
or
become an RSC Donator and contact us.